

Cloud servers such as Amazon Web Services (AWS), Google Cloud Platform (GCP), and DigitalOcean (DO) are an integral aspect of every developer’s practice. They are virtual servers that reside and run in a cloud computing environment.
By hosting or deploying your apps in the cloud, you can ensure better scalability, faster performance, auto-updates, and integrations, and unlimited storage capacity, all at a competitive price. Many top enterprises have migrated to the cloud so as to reduce costs and complexity—and you should too.
PHP is one of the most popular programming languages among software engineers and developers, with over 22% of respondents using it in the past year, according to a 2021 survey on Statista.
As a developer, knowing how to deploy your PHP applications across multiple cloud services such as AWS, GCP, and Digital Ocean DO is important.
This article will guide you on how to host PHP applications in your own account on the Digital Ocean environment.
How To Host PHP in Your DigitalOcean (DO) Account
DigitalOcean provides Virtual Private Servers (VPS), which are called Droplets. At their core, Droplets run on DigitalOcean hardware as Linux virtual machines (VMs).
In the following section, you’ll find out how you can host a PHP website on DigitalOcean Server.
Step 1 : DigitalOcean Registration
Registration at DigitalOcean is straightforward. It only asks for your name, email, and password.
Also, you can register with your Google account. You can register on DigitalOcean with this link.
Step 2: Configuring the Droplet
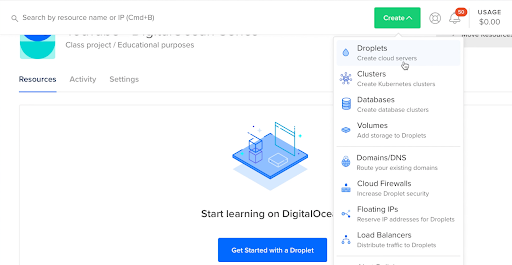
As soon as you log in to your DigitalOcean account, the homepage or “ControlPanel” in this case will greet you. Our next step will be to create the first instance of the DigitalOcean droplet.
To do that, click on the “Create” button that is located in the top left corner and then click on “Droplets” (create cloud servers).
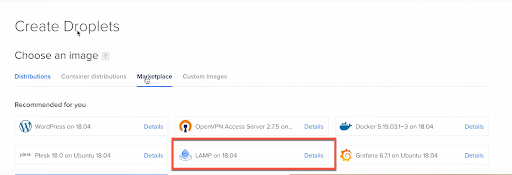
From Marketplace, we can select the LAMP image with version 18.04 or the latest version which is available. This way, DigitalOcean will deploy the latest versions of Linux, Apache, PHP, and MySql installed on a given virtual machine.
Next, you need to choose a plan for DigitalOcean. Choose the plan size you need here or, for demo purposes, select the "Standard plan" and then select the data center closest to your users.
After this, you will also need to set up authentication that will be used to administer and communicate with DigitalOcean Droplet.
In the Authentication section, select the option “SSH keys”. These SSH keys provide a secure way to login into your server.

Next, click on the new SSH keys. The next window requires the public keys from the local system. If the public ssh key is absent use the following command to create:
ssh-keygen
After entering the command, confirm the path and passphrase. Once it has been executed successfully, it will create a private/public key pair in your local system. In the subsequent step, we need to place the public key on the DigitalOcean server so users can use SSH-key-based authentication to log in from their local system.
This can be achieved by running the following command. This will copy the public key to the clipboard.
pbcopy < ~/.ssh/id_rsa.pub
Now, paste it to DigitalOcean and add the public SSH key option as below:
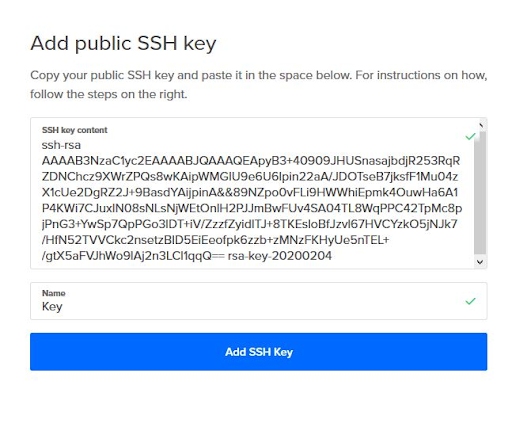
You can then create a droplet by clicking the "create a droplet".
Step 3: Entering the Droplet
Once the Droplet is created, it becomes visible on the resources screen on the homepage.

Using the IP address shown in the Resources tab, you can access the droplet through the web console provided by DigitalOcean. But, for a security issue, I recommend that you do it through a terminal if your computer has Linux or Mac since they come with SSH installed. If you have Windows, you can use Windows PowerShell or Putty. On the terminal you can run the following command:
ssh root@<ip address>
When you connect with the host for the first time, you might see something like this:
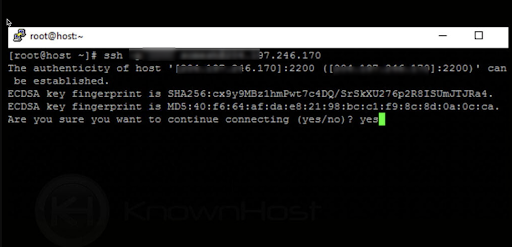
Type Yes and continue.
Once we enter our droplet, we are going to update the operating system with the following commands:
sudo apt-get update
sudo apt-get upgrade
sudo apt-get dist-upgrade
Step 4: Deploy Website to VM instance
This step is important for our website routes to work properly. We execute the following command:
sudo ufw allow in "Apache Full"
This will open port 80 and port 443 for our income website traffic.
Next, we can verify that everything went as planned by visiting the droplet server’s public IP address in the web browser:
http://your_public_server_ip_from_droplet
It should display the default apache page:

This confirms that the web server is installed and firewall settings are allowing incoming connections.
Apache on Ubuntu by default is configured to serve webpages from the /var/www/html folder.
So next, we change permission for the Apache website hosting folder i.e HTML
cd ~
cd var/www
sudo chmod 777 html
Finally, reload Apache so these changes take effect:
sudo systemctl reload apache2
Your new website configuration is active, but the webroot /var/www/html is still empty. Here we can a basic PHP-based “index.php” file to test that the virtual host works as expected:
Create the file “index.php” and add the following content in this .php file:
<!DOCTYPE html>
<html>
   <body>
      <html>
         <head>
            <?php
               echo '<title>My PHP Website Hosted on Cloud</title>';
               ?>
         </head>
         <body>
            <?php
               echo '<p>This content was generated by PHP Code</p>';
               ?>
            <p>You are at myownwebsite.com</p>
         </body>
      </html>
   </body>
</html>
Save and close the file, then go to your browser and access your server’s IP address:
http://public_IP_address
It should display the following PHP page.
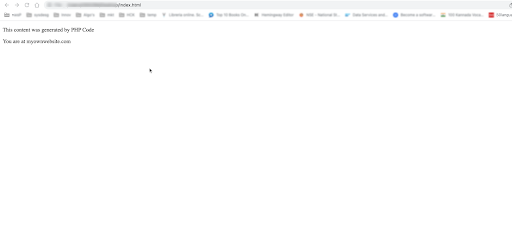
That's it - you've successfully hosted PHP in your Digital Ocean account using Convox! While it’s impossible to cover all the different cloud servers available, this article covers the deployment procedures for a PHP application to Digital Ocean. Since PHP is such a popular language, it’s unlikely that any PHP site will be as simple, and the deployment process as strenuous and complex as the one described in this article.
In that case, there’s a need for more efficient methods for hosting PHP apps from the local machine directly to the production environment. Using a modern and user-friendly Platform as a Service (PaaS) solution like Convox helps you easily deploy and manage PHP applications on all infrastructures, including AWS, Google Cloud, Azure, and DigitalOcean.
With just a few clicks, Convox Multi-Cloud enables you to manage these apps in multiple cloud environments at the same time from a single console, and move between different clouds, taking the term “build once, deploy anywhere” to a whole other level.
Interested in hosting your PHP app on Convox? Get started now in just a few clicks.